Airtable Cloud Service
Airtable is a cloud based storage and collaboration service that features a neat UI to serve users with an interactive way to modify their databases. Airtable Service will work for a specific format of the database, as shown below.
Setting up Airtable
Please go to the website below and create an account. https://airtable.com/ (Links to an external site.)
Airtable lets you create a 'base', which holds all of your 'tables'. 'Tables' are like spreadsheets that you can update from anywhere, and they can hold all sorts of values, like numbers, strings, and dates!
Inside a table, there are 'fields'. Each 'field' has a datatype assigned to it, so numbers can only go in number fields and so on...
Creating an Account
When you create an account at Airtable, you are granted a certain amount of "space" and the ability to create tables through their webbased visual interface. You are also given an access token unique to you that you can use to create external access (read and write) from python scripts to your Airtable data.
To get started: go to Airtable and create an account.
https://airtable.com/signup
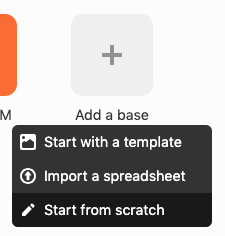
Creating a Base
Then create your first "base" (short for "database") which by default will have a blank table.
Suggestion:
- choose "Start from Scratch"
- name it something relevant, like "EN1Robotics"
Setting Up Your Table
After creating the base, you should see your empty table.
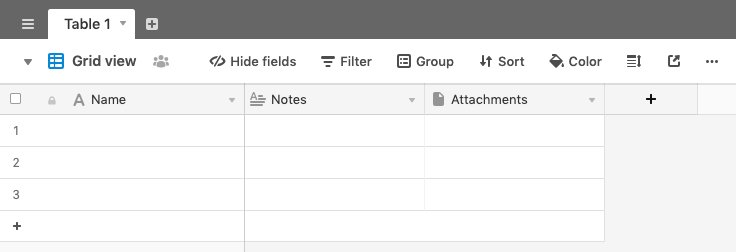
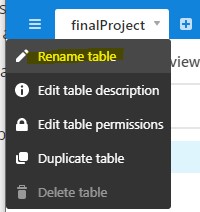
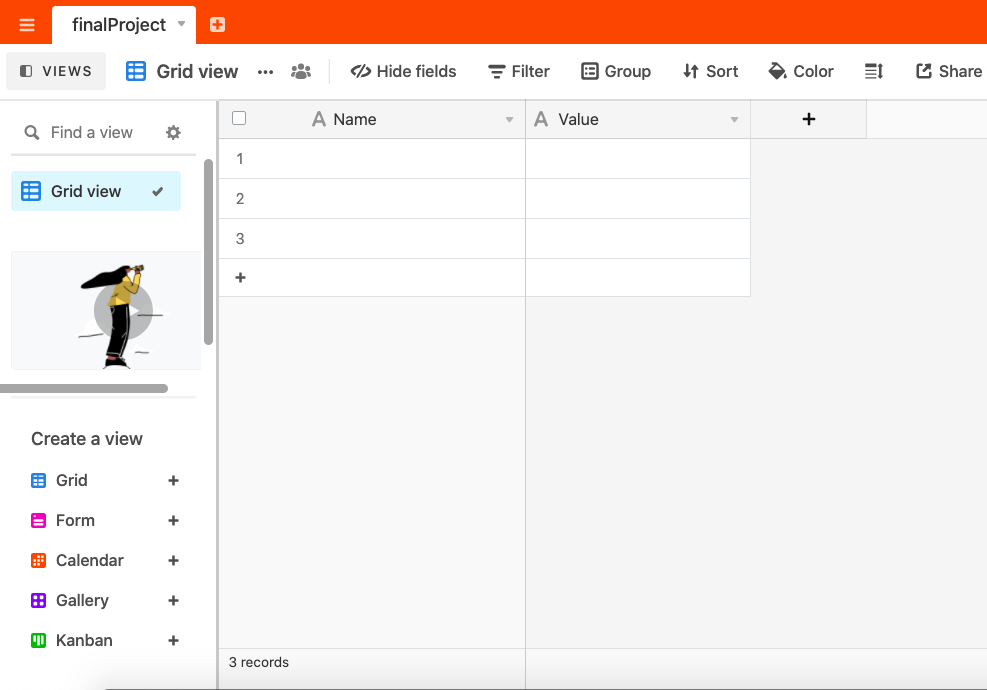
A) Name your table anything. This name will later be used to access your database with Airtable Service. In this picture, it has been named, "finalProject".
B) Rename the "Notes" column to be "Value". Fields under "Name" are keys to your information, where the information you wish to find will be located under the "Value" column. This is very important as Airtable Service looks for "Name" and "Value" to create Key/Value pairs of information.
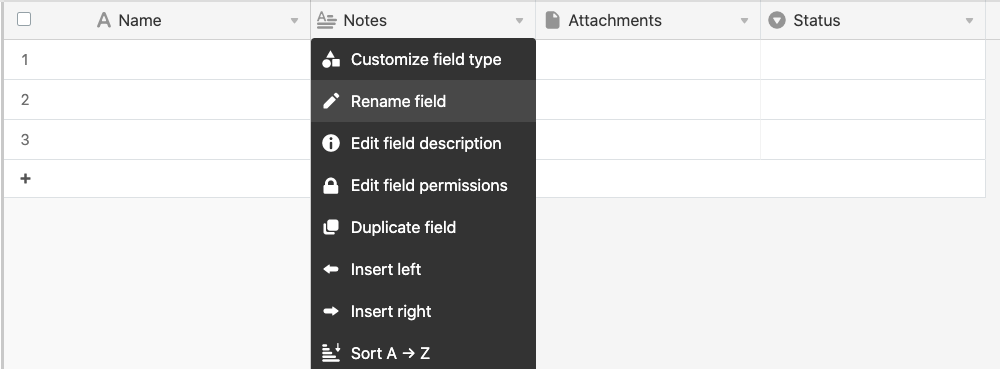
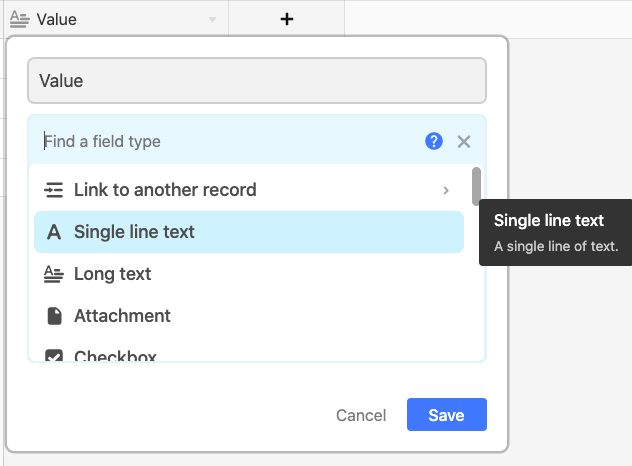
C) Where you can change your column name to "Value", change the field type of the column to be "Single line text".
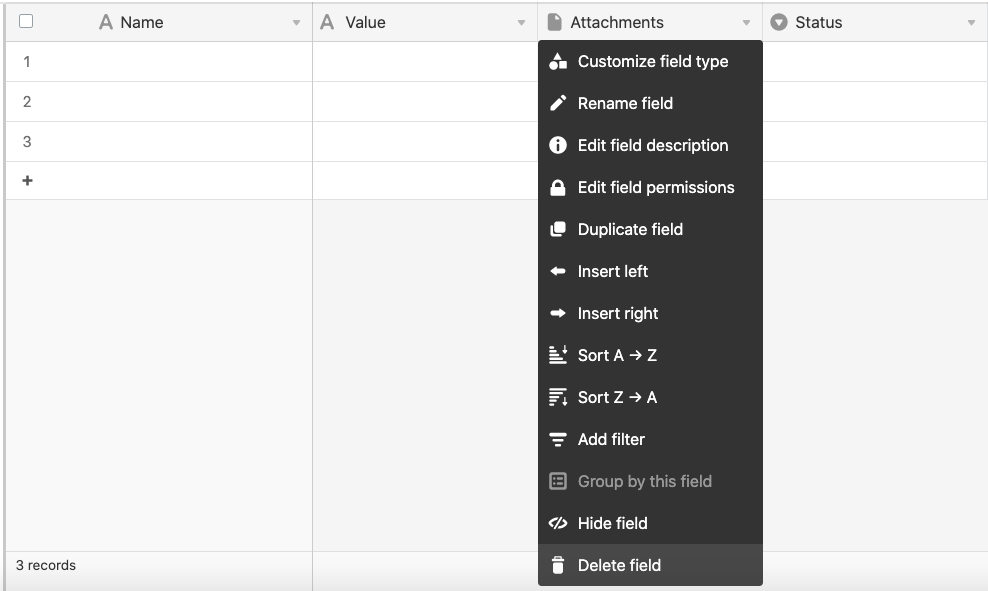
D) Delete columns that are not "Name" and "Value", such as "Attachments" and "Status".
E) You should end with a workspace that looks like the following, with only "Name" and "Value" columns. (Note: the background color may differ)
Using your Table
In your table, each "Tag", one single piece of Key&Value information, is represented by a row of "Name" and "Value" fields. The "Name" is the Tag's identifer, and the "Value" is the information associated with the Tag. In Airtable, all "Value" entries will be in strings, but Airtable Service will implicitly convert your "Value" fields to data types that you give them.
Getting your API Key
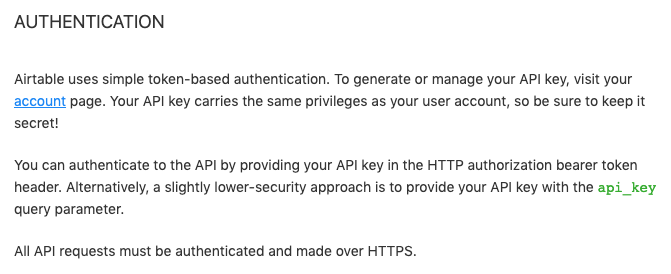
Airtable uses token-based authentication. You need to, from your Airtable account, set up an API Key that will be used by your code for gaining access to your data.
From your account page (https://airtable.com/account (Links to an external site.)) you should generate a key:

This API Key is your "password" for accessing your data. It looks like this:
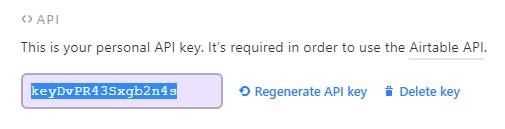
Note: The key in the image is no longer in use.
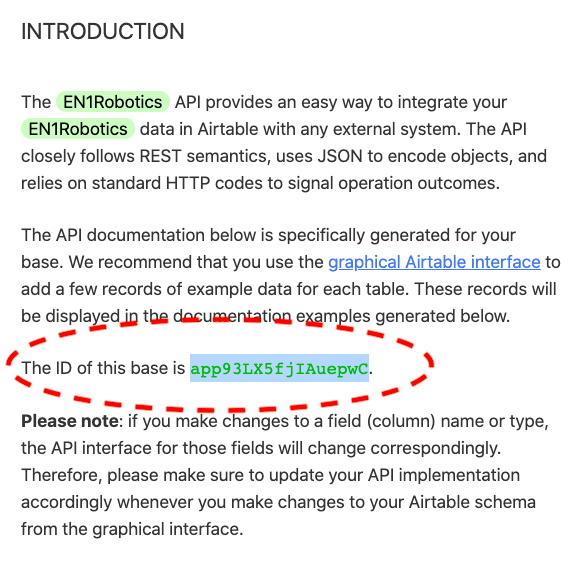
Getting your Base ID
The base ID is needed in order for external applications to access the content in the base you created.
A) Go to https://airtable.com/api B) Select the base you created
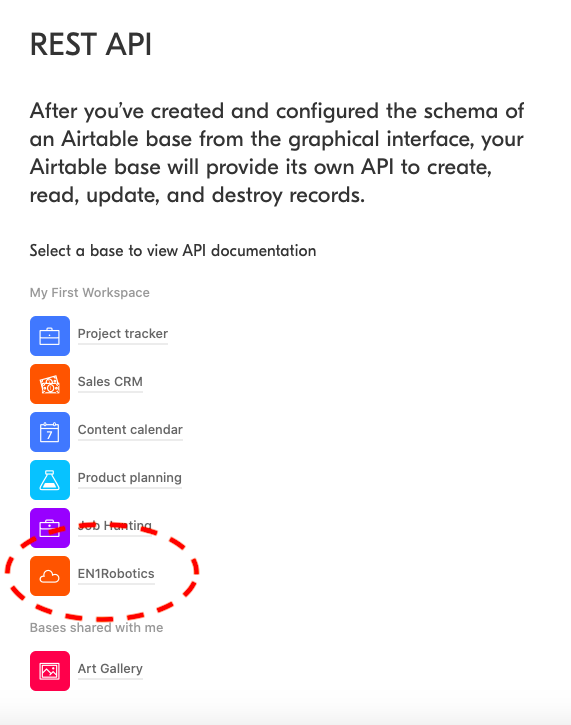
C) Save your Base ID somewhere you can remember!
Where do these go?
Now that you have your (1) API Key, (2) Base ID, and (3) Table Name (what you named your table, e.g. "finalproject"), you will need to supply this to the Airtable Service to interact with your table with Javascript. See other documentation for detail. Have fun!